Keeping your bras in your dresser drawers can be a challenge, especially because they can take up a lot of space and slide out of position seemingly all on their own. It can make you want to give up on keeping them organized and leave them in a messy pile, like it's their only fate.
But don’t worry, there’s a solution to your wardrobe woes and it’s simple. Learn how to fold your bras in the best possible way to keep them organized and make your life easier.
Learning how to fold bras and create a cascade takes a little effort, but it's worth taking the time to do so. It simplifies your bra storage and prevents them from continuous unwanted damage over time. It also makes it easier for you to grab any bra out of your drawer without creating a mess or having to dig around.
To help you make the most of your efforts, we’ve created a guide featuring our expert advice, including steps for how to fold your bras for drawers and bra care tips.
How to Fold Your Bras
Bra-Folding Don’ts
Preparing for Your Bra Drawer Refresh
Smart Bra Storage
How to Fold Your Bras
Use the following tips to learn how to fold your bras to save space. When you’re finished, they’ll be easy to find and look like they’re in a drawer at the chic lingerie store. Let’s get started.
1. Close the Back
Start by closing your bras in the front or back while making sure the hooks or snaps are well-connected and lying flat.
For bras with multiple hooks and catches, connect the band together at the shortest length. This serves to cover the hardware and prevent snags.
2. Tuck the Straps
Begin by holding the bra with the cups facing you, then push the straps down towards the band. Fold the excess in half and push them into the cups. Fold the sides behind the cups after you tuck the straps.
Tucking the straps prevents them from getting tangled, streamlines your bra layout, and keeps you from accidentally grabbing the straps of the wrong bra.
This also helps keep your bras in the best condition by preventing the straps from coming loose and getting caught in the drawer as you open and close it.
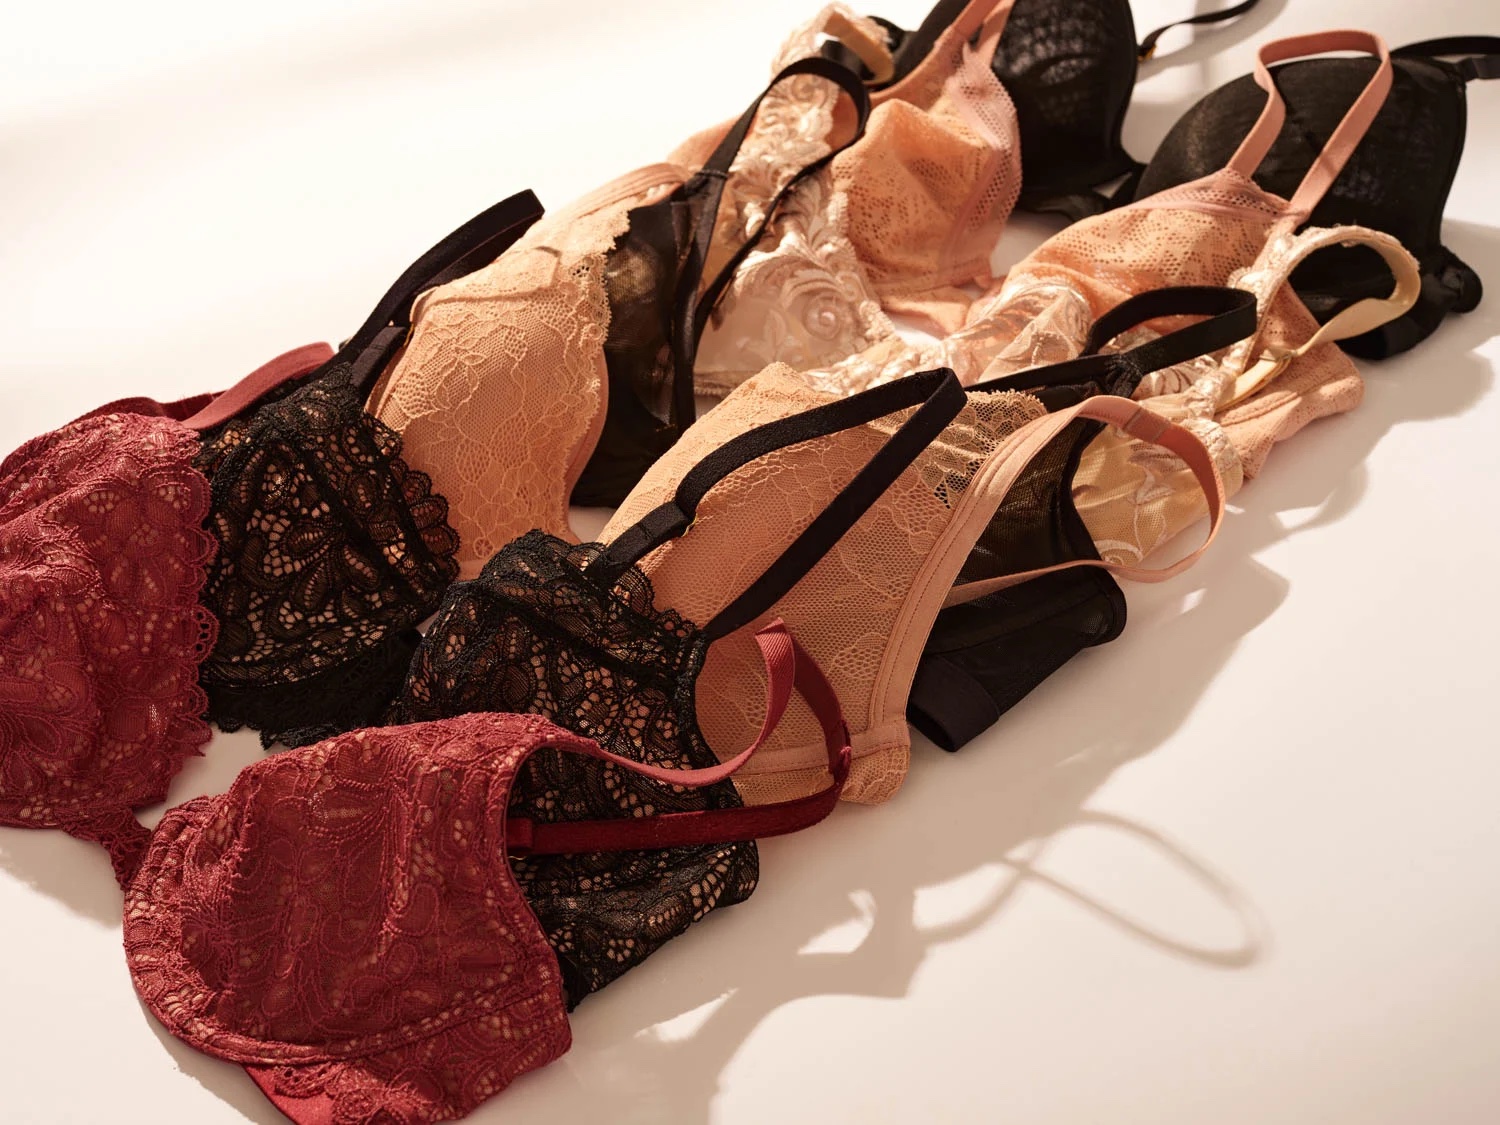
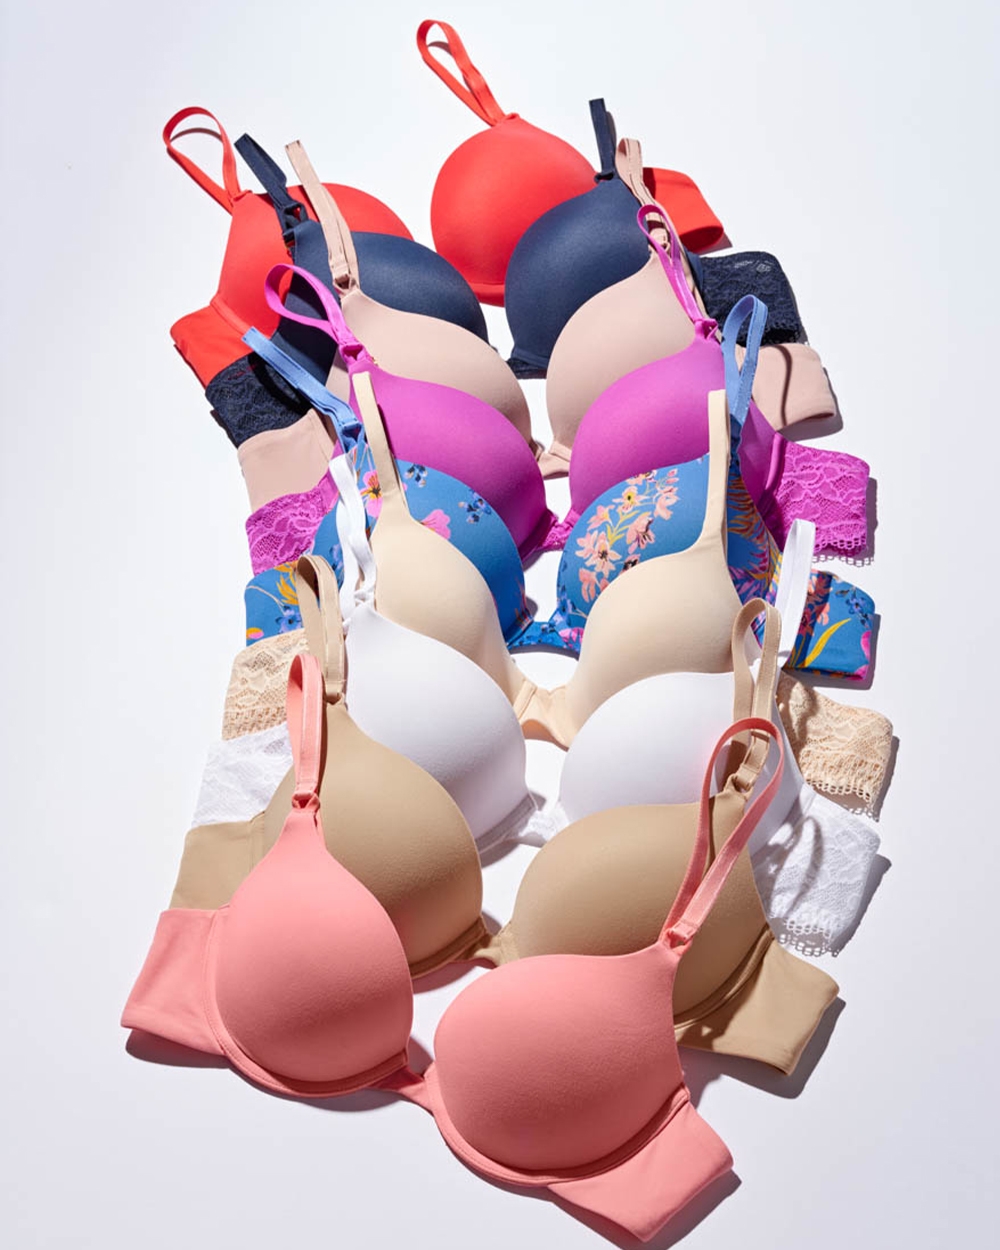
3. Lay Flat & Cascade

Now you’re going to stack, or cascade, your bras. This step is especially important for your bras with molded cups as it prevents them from getting crushed while maintaining their shape.
Start by laying the first bra flat at the back or front of the drawer, whichever you prefer. Place another bra on top and make sure not to completely cover the first bra. Repeat this until all of your bras are in a cascading row in the drawer.
If you’re really tight on space and have bras that aren't molded, you can create flat layers with them on top of each other. Folding is not recommended for most bras but can work for bralettes, sports bras, or wireless bras with minimal or no hardware. Keep the folding to a minimum to avoid damaging the fibers of the material, causing permanent creases, or otherwise damaging your bras.
Whenever possible, we highly recommend cascading all bras.
As you learn how to fold bras to save space, you'll find that the cascade is the most helpful and satisfying part of the process. Cascading lets you do things like place your push-up bras into an organized row of their own and sort by color.
Bra-Folding Don’ts
You'll get more use out of your bra by reducing wear and tear on their fabric and hardware. The following list of bra-folding don'ts will help you extend the life of your bra collection and keep them looking their best.
Don't fold bras into each other–meaning don't invert a cup to fold into the other one.
Don't let your bra or its straps twist before folding.
Don't let your bras flip over one another as you stack them.
Don't stack different types of bras against each other.
We understand not everyone has time or energy to perfect their bra folding skills, but by following these tips it’ll help you avoid some common bra mistakes.
Preparing for Your Bra Drawer Refresh
If you have a big collection, you'll probably want to do some housekeeping before you start reorganizing and cascading your drawer. That means getting rid of bras that don't fit, have telltale signs they need replacing, or you just don’t wear them anymore.
1. Get Rid of the Excess
This is an opportunity to curate your bra collection by getting rid of bras that you don’t plan to wear and are just taking up space.
2. Clean Out Your Drawers
Take the opportunity to clean out your drawers of lint and debris before you start folding your bras. Start by getting rid of the dust, then wipe the surface clean with a warm towel. Allow to fully dry before placing your bras back inside.
3. Get Organized
Use drawer organizers or separators to keep your bras in place and prevent them from traveling around the drawer.
They have small organizers made for delicates that should fit nicely in your drawer. If you want to DIY it, you can make separators from sturdy foam boards.
Smart Bra Storage Tips
Rifling through your drawers to find the bra you need can be frustrating, but it doesn’t have to be. To make getting in and out a breeze–especially when you’re dressing for the day–we recommend these smart bra storage tips.
Tip #1: Put the Bras You Wear Least Toward the Back
With your favorite or most practical bras up front, you’ll be able to access them easily. Placing your least-used bras at the back of the drawer keeps them out of the way. With good organization, they should still be easy to find.
Tip #2: Sort by Size
Many of us have several bra sizes in our collection, but that doesn’t necessarily mean you should toss the ones that aren’t your current size. For example, if you tend to experience weight fluctuations, you’ll want to hold onto them.
Place the ones that fit best in the front of your row, since you’ll be wearing them more, and stick the other sizes at the back for the days you need them.
Tip #3: Keep Similar Bras Together
Stack your similar bras together for the best possible layout. For example, put all your wireless bras in one section and strapless options in another. You can divide your bras in whatever way is most functional for you—for example, putting your everyday bras on the right and your special bras on the left.
Tip #4: Separate Bra by Nudes & Colors
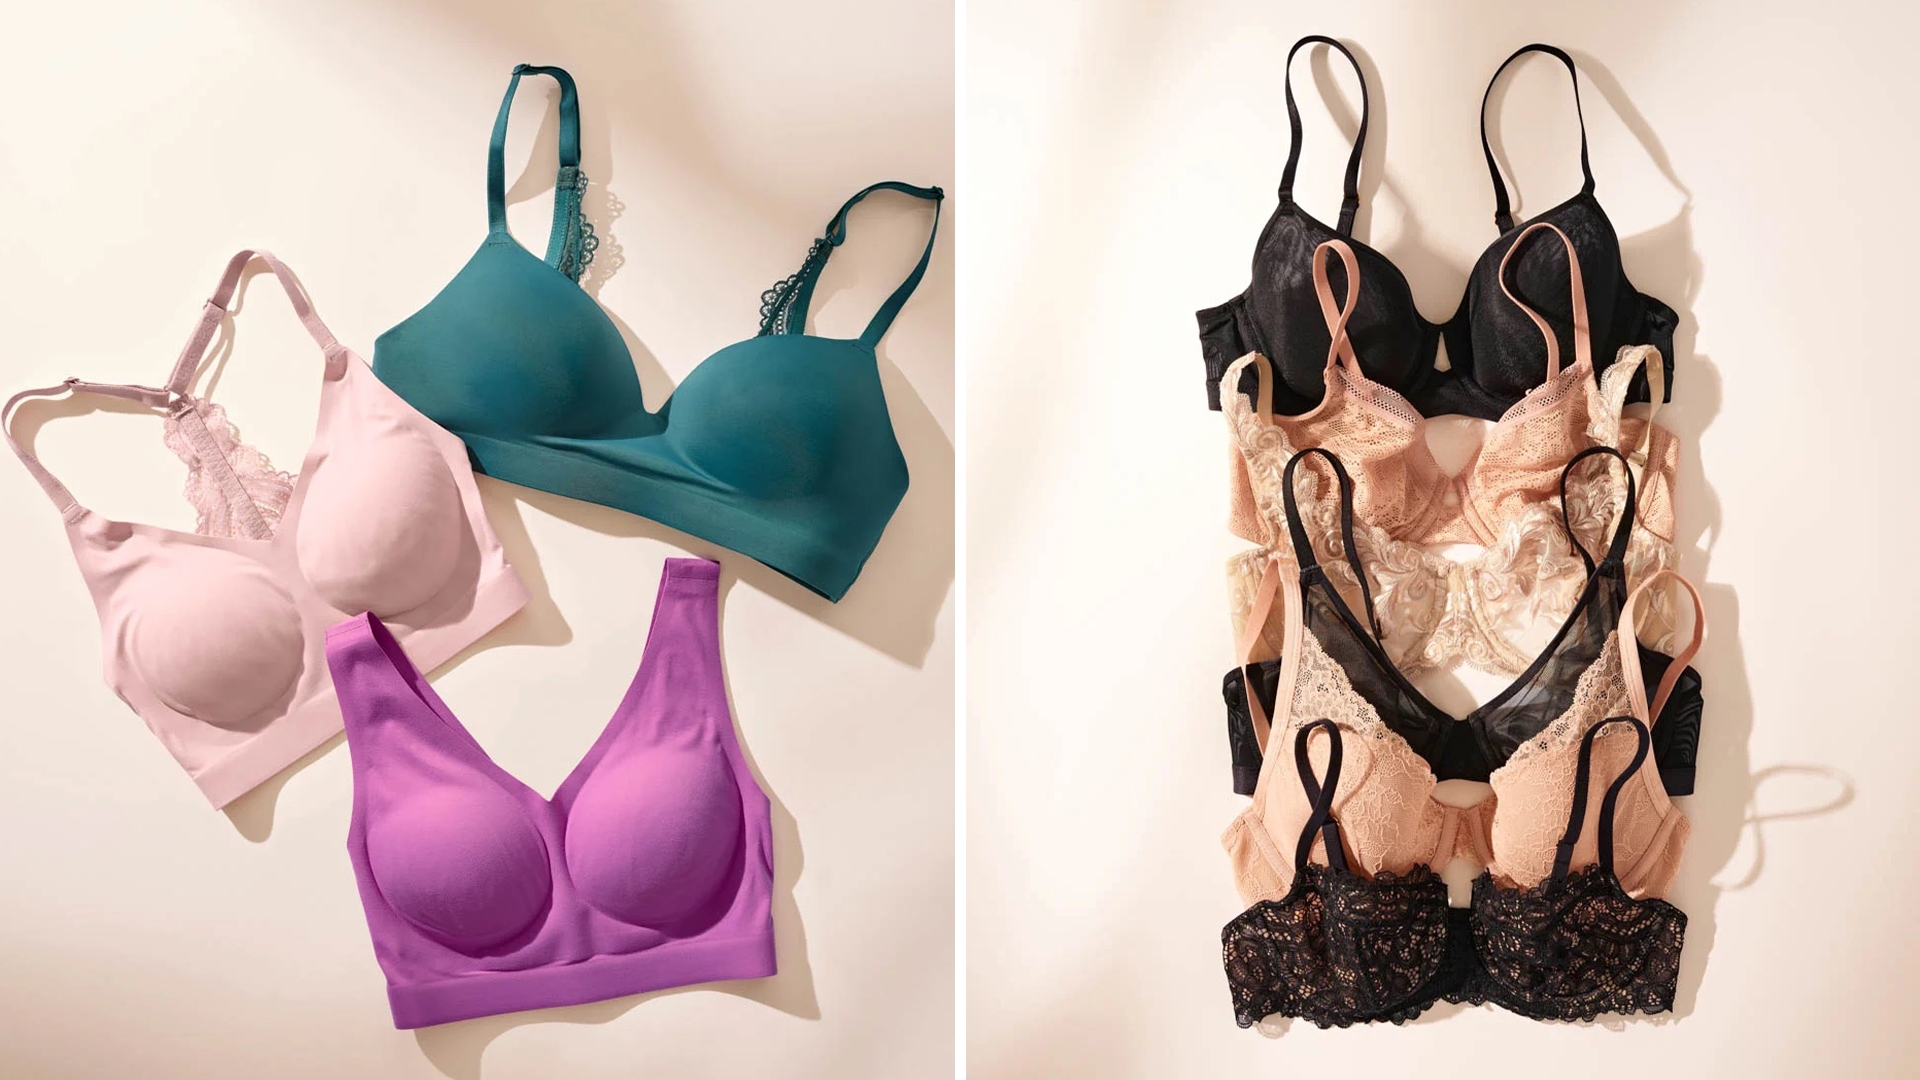
Do you reach for colorful or patterned bras less often? We recommend separating them from your more versatile nude bras. Put colors on one side and black, white, and skin-tone bras on the other for easy dressing.
Keep Your Bras in the Best Shape
Bras are an investment, so it’s worthwhile to take care of them as best you can. Now that you know how to fold your bras, you can take steps to help them keep their shape and last longer.
But not even the best bras last forever. Shop our new arrivals to find new favorites and replace outdated, poor-fitting bras. Or maybe you just want to treat yourself for turning over this new leaf for bra care–either way, we have you covered. Our bras offer all-around comfort and support you’ll fall in love with.
Use our bra menu to find the best style for you.
UP NEXT: How to Fold Underwear Like a Pro